We know that many of our readers are interested in seeing how molecular dynamics applications perform with GPUs, so we are continuing to highlight various packages. This time we will be looking at GROMACS, a well-established and free-to-use (under GNU GPL) application. GROMACS is a popular choice for scientists interested in simulating molecular interaction. With NVIDIA Tesla K40 GPUs, it’s common to see 2X and 3X speedups compared to the latest multi-core CPUs.
Logging on to the Test Drive Cluster
To obtain access, fill out this quick and easy form: sign up for a GPU Test Drive. Once you obtain approval, you’ll receive an email with a list of commands to help you get your benchmark running. For your convenience, you can also reference a more detailed step-by-step guide below.
To begin, log in to the Microway Test Drive cluster using SSH. Don’t worry if you’re unfamiliar with SSH – we include an instruction manual for logging in. SSH is built-in on Linux and MacOS; Windows users need to install one application.
Run GROMACS on CPUs and GPUs
This first step is very easy. Simply enter the GROMACS directory and run the default benchmark script which we have pre-written for you:
cd gromacs
sbatch run-gromacs-on-TeslaK40.sh
Remember that Linux is case sensitive!
Managing GROMACS Jobs on the Cluster
Our cluster uses SLURM for resource management. Keeping track of your job is easy using the squeue command. For real-time information on your job, run: watch squeue (hit CTRL+c to exit). Alternatively, you can tell the cluster to e-mail you when your job is finished by editing the GROMACS batch script file (although this must be done before submitting jobs with sbatch). Run:
nano run-gromacs-on-TeslaK40.sh
Within this file, add the following two lines to the #SBATCH section (specifying your own e-mail address):
#SBATCH --mail-user=[email protected]
#SBATCH --mail-type=END
If you would like to monitor the compute node which is running your job, examine the output of squeue and take note of which node your job is running on. Log into that node using SSH and then use the tools of your choice to monitor it. For example:
ssh node2
nvidia-smi
htop
(hit q to exit htop)
See the speedup of GPUs vs. CPUs
The results from our benchmark script will be placed in an output file called gromacs-K40.xxxx.output.log – below is a sample of the output running on CPUs:
=======================================================================
= Run CPU-only water scaling benchmark system (1536)
=======================================================================
               Core t (s)   Wall t (s)        (%)
       Time:     1434.957       71.763     1999.6
                 (ns/day)    (hour/ns)
Performance:        1.206       19.894
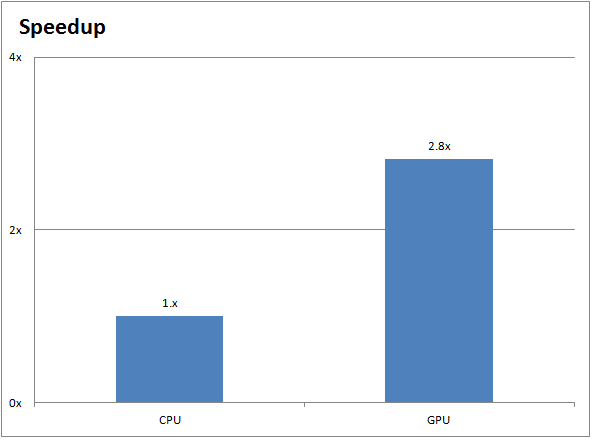
Just below it is the GPU-accelerated run (showing a ~2.8X speedup):
=======================================================================
= Run Tesla_K40m GPU-accelerated water scaling benchmark system (1536)
=======================================================================
               Core t (s)   Wall t (s)        (%)
       Time:      508.847       25.518     1994.0
                 (ns/day)    (hour/ns)
Performance:        3.393        7.074
Should you require more information on a particular run, it’s available in the benchmarks/water/ directory. If your job has any problems, the errors will be logged to the file gromacs-K40.xxxx.output.errors
The chart below demonstrates the performance improvements between a CPU-only GROMACS run (on two 10-core Ivy Bridge Intel Xeon CPUs) and a GPU-accelerated GROMACS run (on two NVIDIA Tesla K40 GPUs):

Benchmarking your GROMACS Inputs
If you’re familiar with BASH, you can of course create your own batch script, but we recommend using the run-gromacs-your-files.sh file as a template for when you want to run you own simulations. You can upload these files yourself or you can build them. If you opt for the latter, you need to load the appropriate software packages by running:
module load cuda/6.5 gcc/4.8.3 openmpi-cuda/1.8.1 gromacs
Once your files are either created or uploaded, you’ll need to ensure that the batch script is referencing the correct input files. The relevant parts of the run-gromacs-your-files.sh file are:
echo  "=================================================================="
echo  "= Run CPU-only water scaling benchmark system (1536)"
echo  "=================================================================="

srun --mpi=pmi2 -n $num_processes -c $num_threads_per_process mdrun_mpi -s topol.tpr -npme 0 -resethway -noconfout -nb cpu -nsteps 10000 -pin on -v
and for execution on GPUs:
echo  "=================================================================="
echo  "= Run ${GPU_TYPE} GPU-accelerated benchmark"
echo  "=================================================================="

srun --mpi=pmi2 -n $num_processes -c $num_threads_per_process mdrun_mpi -s topol.tpr -npme  0 -resethway -noconfout -nsteps 1000 -pin on -v
Although you might not be familiar with all of the above GROMACS flags, you should hopefully recognize the .tpr file. This binary file contains the atomic-level input of the equilibration, temperature, pressure, and other inputs that the grompp module has processed. The flags themselves are important for benchmarking and are explained below:
- -npme 0: This flag is normally used to tell GROMACS how many threads to use. However, unless you have compute nodes with different numbers of cores, it’s best to let MPI manage the threads.
- -resethway: As the name suggests, this flag acts as a time reset. Half way through the job, GROMACS will reset the counter so that any overhead from memory initialization or load balancing won’t affect the benchmark score.
- -noconfout: For when you want to once again reduce overhead, this flag tells GROMACS to not create a
toconfout.grofile. - -nsteps 1000: A tag that you’re probably familiar with, this one lets you set the maximum number of integration steps. It’s useful to change if you don’t want to waste too much time waiting for your benchmark to finish.
- -pin on: Finally, this tag lets you set affinities for the cores, meaning that threads will remain locked to cores and won’t jump around.
If you’d like to visualize your results, you will need to initialize a graphical session on our cluster. You are welcome to contact us if you’re uncertain of this step. After you have access to an X-session, you can run VMD by typing the following:
module load vmd
vmd
Next Steps for GROMACS GPU Acceleration
As you can see, we’ve set up our Test Drive so that running GROMACS on a GPU cluster isn’t much more difficult than running it on your own workstation. Benchmarking CPU vs GPU performance is also very easy. If you’d like to learn more, contact one of our experts or sign up for a GPU Test Drive today!

Citation for GROMACS:
Berendsen, H.J.C., van der Spoel, D. and van Drunen, R., GROMACS: A message-passing parallel molecular dynamics implementation, Comp. Phys. Comm. 91 (1995), 43-56.
Lindahl, E., Hess, B. and van der Spoel, D., GROMACS 3.0: A package for molecular simulation and trajectory analysis, J. Mol. Mod. 7 (2001) 306-317.
Featured Illustration:
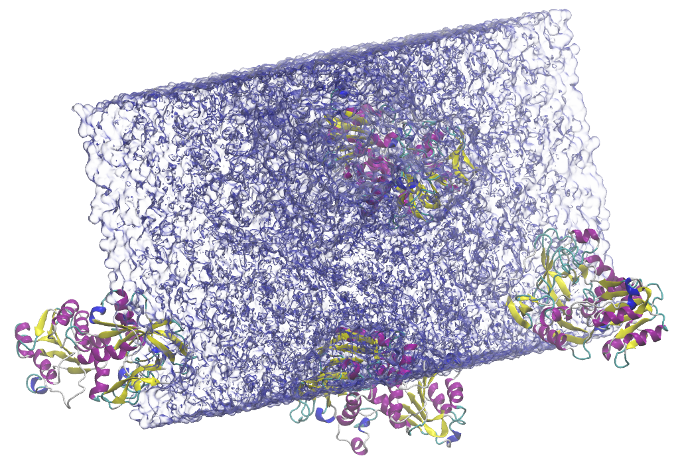
Solvated alcohol dehydrogenase (ADH) protein in a rectangular box (134,000 atoms)
https://www.gromacs.org/topic/heterogeneous_parallelization.html
Citation for VMD:
Humphrey, W., Dalke, A. and Schulten, K., “VMD – Visual Molecular Dynamics” J. Molec. Graphics 1996, 14.1, 33-38
https://www.ks.uiuc.edu/Research/vmd/
